How To Draw A Chick – Permit’s Begin! In Six Step of Drawing
How to draw a chick
Draw a chick in just 6 easy steps! When you have a cute pet, the only way to make it even cuter is to have a baby version! This is indeed the issue with weaklings. Chickens are cute, but that cuteness increases once a chick is born. You may also learn many things cartoon drawing, scary drawing, pencil drawing, cool things to draw, scary drawing, cartoon drawing, creative drawing, and flower drawing.
How to draw a chick – permit‘s begin!
Step 1
This first step of our focus on seducing a chick will begin with the design of the charge of this little bird. We will use curved lines connecting to the head’s sides to give it a nice, fluffy look. Next, for the top of the head, we’ll use curved lines with sharp points on the face. The face will be blank for now, but we will add face details soon.
Step 2: Nowadays, can some facial characteristics for the chick.
For the second part of this drawing of a chick, we are going to add some facial details. The girl’s eyes will be quite large, as this only adds to the cuteness of the image! You can draw them as two large oval shapes, and then each will have smaller ovals inside the outline of the pupils. Next, add a few small, curved shapes to the outer eye area for pretty lashes.
Step 3: Plan this chick’s body.
With the head done, we can now work on the outline of the body in this third step of our guide on drawing a chick. We’ll use more curvy, bumpy lines for this body outline to give the feathers a nice, fluffy look. The upper half of the body will be slightly thicker and thinner as you go down.
Step 4: Following, drag the pieces of this chick.
Before adding some final details to complete this chick drawing, we will first add some paws for the little one. The legs will be quite short and slightly drooping, then long toes will stick out from the ends. Each toe will also have a small pointed nail at the end.
Step 5: Last Count Files to Your Chick Sketch
You finished the outlines of this image in the previous step, and in this fifth step of our guide, we’ll finish the final touches and details. These details will be quite small and simple, but they will go a long way to making this image more dynamic. We added curved and irregular lines inside the body of this chick to make the feathers more fluffy and puffy.
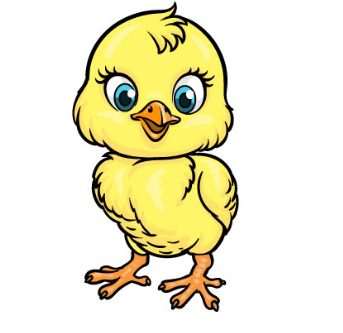
Step 6: Finished drawing your chick with stain.
In real life, chicks can have different colors, but they are often found in bright yellow. That’s what we’re looking for in our sample image for this chick design, and if you want that classic color scheme, you can check it out for help! We also used bright oranges to finish the chick’s beak and feet.